
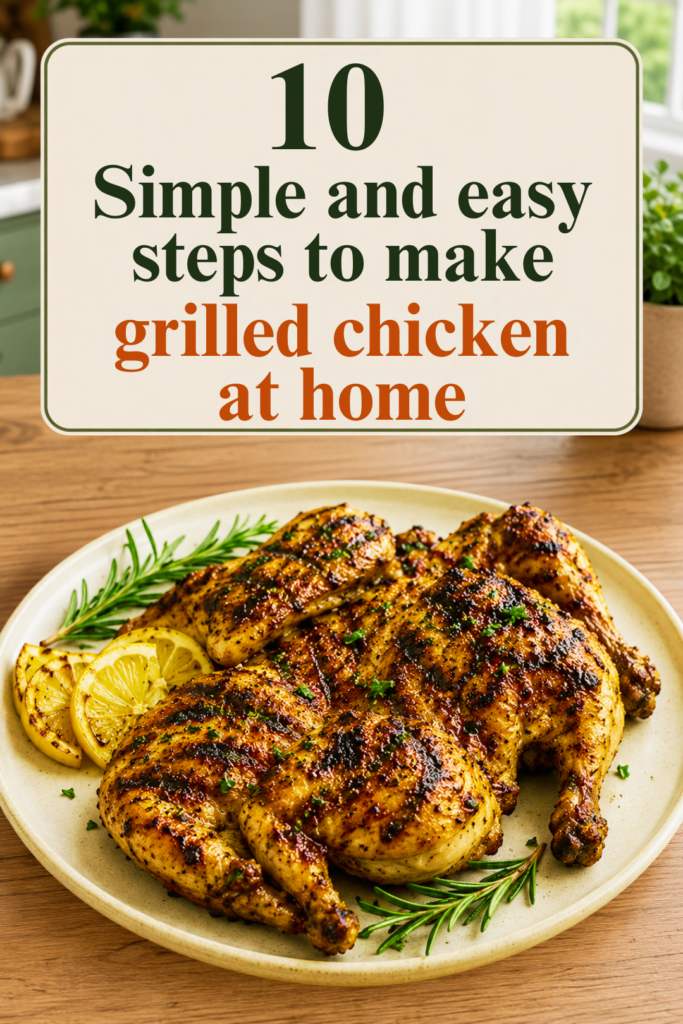
There is something about perfectly grilled chicken that makes it hard to resist. The outside gets beautifully charred, the edges become slightly crispy, and the inside stays juicy and tender.
The best part is that you don’t need a complicated recipe or a long list of ingredients to make it at home.
This easy grilled chicken recipe uses a simple marinade made with olive oil, lemon juice, garlic, and a few everyday seasonings.
The marinade adds plenty of flavor while also helping keep the chicken moist while it cooks.
Whether you’re making dinner for your family, preparing chicken for meal prep, or simply craving something smoky and flavorful, this recipe is a great one to keep handy.
Follow these 10 simple steps, and you’ll have juicy homemade grilled chicken ready to serve.
Why You’ll Love This Grilled Chicken Recipe?
Before getting started, here are a few reasons this recipe has become one of my favorite ways to prepare chicken.
First, the ingredients are simple. You probably already have most of the seasonings sitting in your kitchen. Second, the marinade comes together in just a few minutes.
And finally, the chicken doesn’t need a complicated cooking technique.
The key is really in three things: marinating the chicken properly, getting the grill hot enough, and not overcooking the chicken.
Once you get those three things right, making great grilled chicken at home becomes surprisingly easy.
Ingredients You’ll Need
For about 4 servings, you’ll need:
- 4 boneless, skinless chicken breasts
- 3 tablespoons olive oil
- 2 tablespoons fresh lemon juice
- 3 garlic cloves, finely minced
- 1 teaspoon paprika
- 1 teaspoon Italian seasoning
- 1 teaspoon salt
- ½ teaspoon black pepper
- ½ teaspoon onion powder
- 1 tablespoon chopped fresh parsley
- Lemon wedges, for serving
You can also use chicken thighs if you prefer darker meat. Thighs are naturally more forgiving because they contain more fat, so they tend to stay juicy even if they cook a little longer.
10 Simple Steps to Make Grilled Chicken
1. Prepare the Chicken
Start by taking the chicken breasts out of their packaging and patting them dry with paper towels.
This small step is worth doing because removing excess moisture from the surface helps the marinade stick better to the chicken.
It also makes it easier to get those nice browned and slightly charred edges when the chicken hits the grill.
If your chicken breasts are very thick in the middle, place them between two pieces of plastic wrap or parchment paper and gently pound them with a meat mallet until they’re more even in thickness.
You don’t need to make them completely flat. The goal is simply to make the thickest part closer in size to the thinner edges.
This helps the chicken cook more evenly instead of having dry edges and an undercooked center.
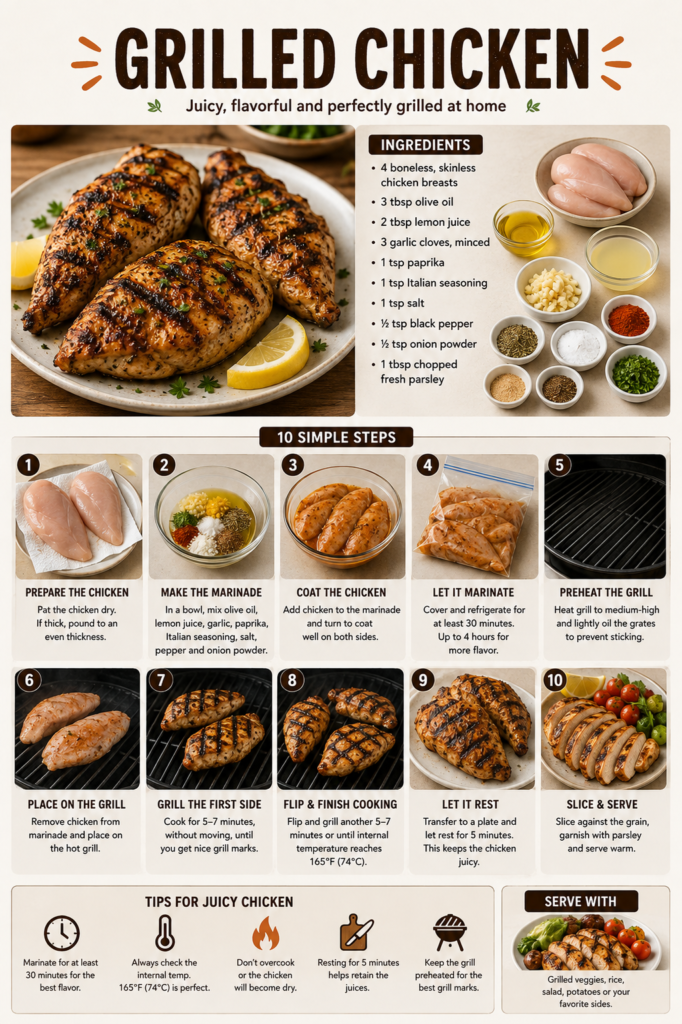
2. Make the Simple Marinade:
Now it’s time to make the marinade.
Add the olive oil, lemon juice, minced garlic, paprika, Italian seasoning, salt, black pepper, and onion powder to a medium-sized bowl.
Whisk everything together until the ingredients are well combined.
The olive oil helps coat the chicken and keeps it from drying out too quickly. Lemon juice adds a little acidity and brightness, while garlic and the seasonings give the chicken most of its flavor.
You don’t need anything fancy here. A simple marinade often works better than one overloaded with ingredients.
3. Coat the Chicken Well:
Place the chicken breasts into the bowl with the marinade.
Use tongs or clean hands to turn each piece several times, making sure the marinade covers both sides.
Don’t just drizzle the marinade over the top and leave it there. Take a moment to really coat the chicken, especially around the thicker areas.
Once everything is coated, cover the bowl or transfer the chicken to a zip-top bag.
If you’re using a bag, gently press out most of the air before sealing it. This helps the marinade stay in contact with the chicken.
4. Let the Chicken Marinate:
This is the step where patience pays off.
Place the covered chicken in the refrigerator and let it marinate for at least 30 minutes.
If you have more time, you can let it marinate for up to about 4 hours. The longer resting time allows the garlic, herbs, lemon, and spices to work their way into the chicken.
You don’t have to marinate it overnight for this recipe. In fact, because the marinade contains lemon juice, leaving the chicken in it for an excessively long time isn’t necessary.
If you’re planning dinner ahead of time, preparing the marinade earlier in the day is an easy way to save time later.
5. Preheat the Grill:
When you’re ready to cook, preheat your grill over medium-high heat.
Give the grill enough time to become properly hot. A hot grill is important because it helps the chicken start cooking immediately and gives you those delicious browned grill marks.
Before adding the chicken, lightly oil the grill grates.
You can do this by putting a little oil on a folded paper towel and carefully rubbing it over the grates using long-handled tongs.
Don’t use too much oil. You just want a light coating to help prevent the chicken from sticking.
6. Place the Chicken on the Grill:
Take the chicken out of the refrigerator and allow any excess marinade to drip off.
Place the chicken directly onto the hot grill.
You should hear a gentle sizzle as the chicken touches the grates. That’s a good sign.
Once the chicken is on the grill, try not to move it around too much. Constantly flipping or sliding the chicken can prevent it from developing a nice crust and grill marks.
Let it cook undisturbed for several minutes.
7. Cook the First Side:
Grill the chicken for approximately 5–7 minutes, depending on the thickness of the breasts and the heat of your grill.
Don’t rely only on the clock, though. Every grill is slightly different, and thicker chicken will naturally take longer to cook.
After a few minutes, you can gently lift one edge of the chicken with tongs.
If it has developed dark golden-brown grill marks and releases fairly easily from the grates, it’s probably ready to flip.
If it sticks badly, give it another minute or two. Trying to force chicken off the grill too early can cause the browned surface to tear.
8. Flip and Finish Cooking:
Once the first side is nicely browned, flip the chicken over using tongs.
Continue grilling for another 5–7 minutes, or until the chicken is cooked through.
This is the most important part of the recipe: don’t guess whether the chicken is done based only on its appearance.
The safest way to check is with an instant-read meat thermometer. Insert it into the thickest part of the chicken without touching the grill or bone.
The chicken should reach an internal temperature of 165°F (74°C).
If the outside is becoming too dark before the inside is cooked, move the chicken to a slightly cooler part of the grill and allow it to finish cooking more gently.
9. Let the Chicken Rest:
Once the chicken reaches the correct internal temperature, remove it from the grill and place it on a clean plate or cutting board.
Now comes another step that’s easy to skip but makes a noticeable difference: let the chicken rest for about 5 minutes.
I know it’s tempting to slice into it immediately, especially when it smells this good, but giving the chicken a few minutes to rest allows the juices to settle back into the meat.
If you cut it immediately, more of those juices can run onto the plate instead of staying inside the chicken.
Just loosely cover the chicken with foil if you want to keep it warm, but don’t wrap it tightly.
10. Slice and Serve:
After resting, your grilled chicken is ready to serve.
For the most tender slices, cut the chicken against the grain. This shortens the muscle fibers and makes each bite easier to chew.
Finish it with a little freshly chopped parsley, cracked black pepper, or a squeeze of fresh lemon juice.
You can serve the chicken alongside grilled vegetables, roasted potatoes, rice, a fresh salad, or even tucked into wraps and sandwiches.
It’s also delicious sliced over a bowl with greens, tomatoes, cucumber, avocado, and your favorite dressing.
Tips for Juicy Grilled Chicken
If you’ve ever made grilled chicken that turned out dry, you’re definitely not alone. Chicken breast is lean, so it can go from perfectly cooked to dry surprisingly quickly.
Here are a few things that make a big difference.
Don’t skip the marinade. Even a short 30-minute marinade adds flavor and helps the chicken stay moist.
Try to keep the chicken an even thickness. If one end is much thicker than the other, the thinner portion can become dry before the center is cooked.
Preheat the grill properly. Putting chicken onto a cold or lukewarm grill can cause sticking and uneven browning.
Don’t constantly flip the chicken. Give each side enough time to develop a good sear.
Use a meat thermometer. This is the easiest way to avoid both undercooked and overcooked chicken.
Let the chicken rest. Those five minutes really are worth it.
Can I Use Chicken Thighs Instead?
Absolutely.
Chicken thighs are an excellent choice for grilling because they contain more fat than chicken breasts and are naturally juicy.
Boneless, skinless thighs can be prepared using the exact same marinade. They may take a little less or more time depending on their size, so use the internal temperature rather than relying solely on cooking time.
You can also grill bone-in chicken pieces, but they will require a longer cooking time.
What to Serve With Grilled Chicken:
This chicken is incredibly versatile, so you can build a completely different meal around it each time.
For a light dinner, serve it with a simple green salad and grilled vegetables.
For something more filling, add roasted potatoes, rice, or corn on the cob.
You can also slice leftover chicken and use it in sandwiches, wraps, tacos, salads, or grain bowls the next day.
One of my favorite options is simply serving the chicken with warm pita bread, cucumber, tomatoes, and a creamy garlic or yogurt-based sauce.
How to Store Leftover Grilled Chicken?
If you have leftovers, let the chicken cool and place it in an airtight container.
Store it in the refrigerator and use it within 3–4 days.
When reheating, try not to overcook it. A microwave can make chicken dry if it’s heated for too long, so reheat it in short intervals.
You can also slice the cold chicken and add it directly to salads or wraps.
Final Thoughts:
Making grilled chicken at home doesn’t have to be complicated. With a simple marinade, a properly heated grill, and a little attention to cooking temperature, you can make chicken that’s flavorful, juicy, and beautifully charred.
The biggest mistake is usually cooking the chicken for too long. So keep an eye on the temperature, let it rest after grilling, and you’ll be surprised at how much of a difference these small details make.
Once you’ve made this recipe a couple of times, you can easily make it your own. Add a little cayenne for heat, swap the herbs for your favorites, or add a touch of honey to the marinade for a slightly sweeter glaze.
It’s one of those recipes that’s simple enough for a busy weeknight but tasty enough to serve at a weekend barbecue.
And honestly, when that beautifully grilled chicken comes off the grill with those golden-brown edges and smoky char marks, you’ll probably find yourself making it again very soon.