
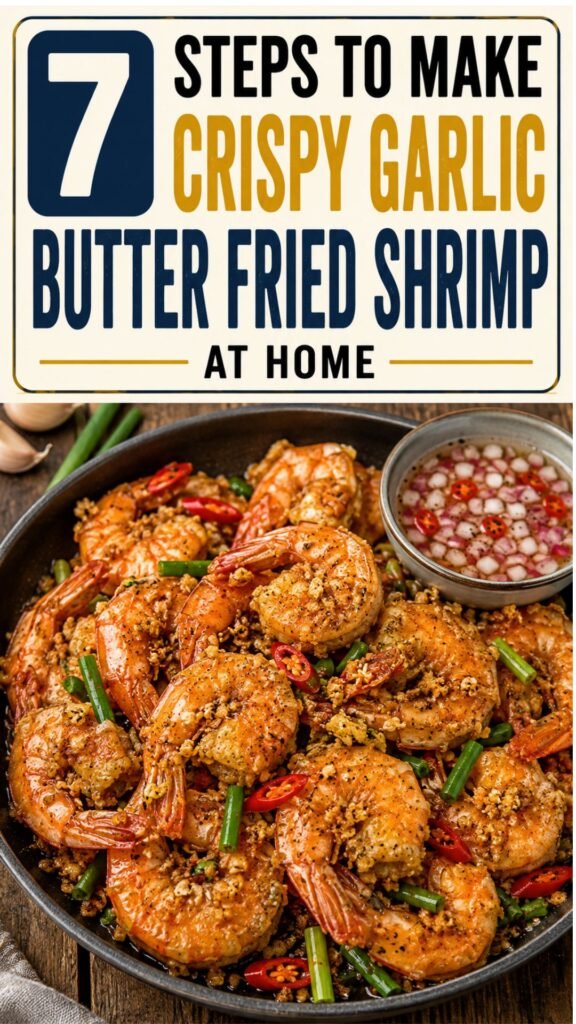
Some recipes are good because they’re easy. Others are good because that first bite makes everyone at the table immediately reach for another one.
This Crispy Garlic Butter Fried Shrimp definitely falls into the second category.
You get large shell-on shrimp with a light, crisp coating—not a thick, heavy breading—and then, while they’re still hot, they’re tossed quickly in a skillet with butter, a whole lot of fresh garlic, soy sauce, a touch of brown sugar, green onions, and chili if you want some heat.
The result is exactly the kind of shrimp I love: crispy around the edges, juicy inside, buttery and garlicky without being drowned in sauce.
And then there’s the vinegar dip.
That sharp, tangy little bowl on the side might seem simple, but it works so well with the rich garlic butter shrimp. Dip a hot crispy shrimp into it and you get buttery, salty, garlicky, tangy, and spicy all in one bite.
The whole recipe takes about 32 minutes, and most of the actual cooking happens very quickly.
Ingredients You’ll Need
For the Shrimp
- 2 lb large shell-on shrimp, cleaned and patted very dry
- 1 teaspoon salt
- ½ teaspoon black pepper
- 1 teaspoon garlic powder
- ½ teaspoon paprika
- ⅓ cup cornstarch
- Neutral oil, for shallow frying
For the Garlic Butter Glaze
- 10 garlic cloves, very finely minced
- 2 tablespoons unsalted butter
- 1 tablespoon low-sodium soy sauce
- 1 teaspoon brown sugar
- 2 green onions, cut into short pieces
- 1 small red chili, sliced, optional
For the Vinegar Dip
- ½ cup cane vinegar or white vinegar
- 2 tablespoons finely diced red onion
- 1 garlic clove, minced
- 1 small chili, sliced, optional
- ¼ teaspoon black pepper
- Small pinch of salt
- ½ teaspoon sugar, optional
7 Steps to Make Crispy Garlic Butter Fried Shrimp
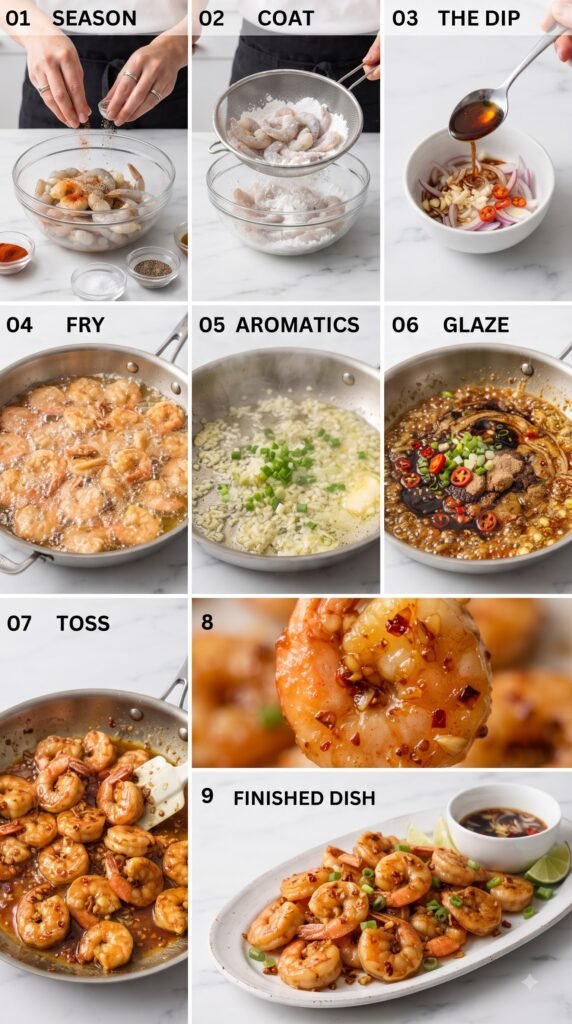
Step 1: Season the Shrimp
Start with 2 pounds of large shell-on shrimp that have been cleaned and patted very dry.
That last part matters.
Really dry them.
Extra surface moisture works against us when we’re trying to create a crisp exterior.
Place the shrimp in a large bowl and add:
1 teaspoon salt
½ teaspoon black pepper
1 teaspoon garlic powder
½ teaspoon paprika
Toss everything together until the seasoning is evenly distributed over the shrimp.
Already, they should have a nice warm color from the paprika.
But we’re just getting started.
Step 2: Give Them a Light Cornstarch Coating
Sprinkle ⅓ cup cornstarch over the seasoned shrimp.
Toss until each shrimp has a light coating.
The word light is important here.
If you see thick clumps of cornstarch hanging onto the shrimp, shake off the excess.
We’re not making a thick batter.
That thin layer of cornstarch is there to help the exterior crisp up when it hits the hot oil while still keeping the shrimp themselves front and center.
Think crispy shrimp.
Not shrimp hiding inside a winter coat.
Step 3: Make the Vinegar Dip
Before frying, get the dipping sauce ready.
In a small bowl, combine:
½ cup cane vinegar or white vinegar
2 tablespoons finely diced red onion
1 minced garlic clove
1 small sliced chili, if using
¼ teaspoon black pepper
a small pinch of salt
If you’d like to soften some of that sharp vinegar flavor, stir in the optional:
½ teaspoon sugar.
Mix everything together and set the bowl aside.
This gives the onion, garlic, and chili a little time to mingle with the vinegar while you cook the shrimp.
And trust me—once you’ve got buttery fried shrimp on your plate, that sharp vinegar dip makes a lot of sense.
Step 4: Fry the Shrimp
Pour about ½ inch of neutral oil into a wide skillet.
Heat it over medium-high heat until the oil is shimmering.
Now fry the shrimp in batches.
Don’t crowd the skillet.
If you put all 2 pounds in at once, the temperature of the oil will drop and those shrimp are much more likely to steam than crisp.
Cook each batch for approximately:
75–90 seconds on the first side
then
45–60 seconds on the second side.
You’re looking for shrimp that are crisp on the outside and just cooked through.
Transfer the cooked shrimp to a paper towel-lined plate while you finish the remaining batches.
And resist the urge to keep frying them because you want them “extra crispy.”
Shrimp cook quickly.
Overcooked shrimp don’t become better fried shrimp.
They become rubber bands with garlic powder.
Step 5: Toast the Garlic in Butter
Once all the shrimp are fried, carefully pour off most of the frying oil.
Leave approximately:
1 tablespoon oil
in the skillet.
Now reduce the heat to medium-low.
Add:
2 tablespoons unsalted butter
and
10 very finely minced garlic cloves.
Yes.
Ten.
We’re committed now.
Cook the garlic gently, stirring frequently, for about:
30–45 seconds.
You’re looking for garlic that’s fragrant and lightly golden.
Not dark brown.
Not crispy black bits.
Garlic can go from perfect to burnt remarkably fast, particularly when it’s minced this finely.
So stay with the skillet.
Step 6: Build the Garlic Butter Glaze
Once the garlic is lightly golden, stir in:
1 tablespoon low-sodium soy sauce
1 teaspoon brown sugar
2 green onions, cut into short pieces
If you want some heat, add:
1 small sliced red chili.
Cook everything together for just a few seconds.
You’re not trying to create a thick sauce or reduce this into a sticky glaze.
We’re simply bringing together the butter, toasted garlic, soy sauce, brown sugar, green onion, and chili.
At this point, your kitchen is going to smell ridiculous.
In a good way.
Step 7: Toss the Shrimp in the Garlic Butter
Return all the fried shrimp to the skillet.
Quickly toss them through the garlic butter mixture for:
20–30 seconds.
That’s all.
You want the shrimp evenly coated in butter with plenty of those golden garlic pieces clinging to the shells.
You don’t want to leave the shrimp simmering in the skillet.
They’re already cooked.
This final toss is purely about getting that garlic butter glaze onto every shrimp while keeping the exterior as crisp as possible.
Transfer them to a serving platter and get that vinegar dip alongside them.
Eat while they’re hot.
The Secret to Crispy Shrimp Starts Before Frying
If I had to pick one detail not to rush, it would be drying the shrimp.
The recipe specifically starts with shrimp that have been patted very dry.
That’s because we’re trying to fry the exterior.
Water and hot oil aren’t particularly friendly to each other, and excess moisture also makes it harder to achieve that light crispy finish we’re after.
I like to spread the cleaned shrimp out and give them a thorough pat with paper towels before seasoning.
It’s an extra minute that pays off later.
Don’t Turn the Cornstarch Into Breading
Another important detail is the amount of cornstarch.
For 2 pounds of shrimp, we’re only using ⅓ cup.
After tossing, shake off any heavy excess.
You should still be able to clearly see the shrimp.
When fried, that light dusting creates little crisp areas across the shell that are perfect for catching all the garlic butter afterward.
A thick coating would completely change the texture of this recipe.